How to make Blender run faster
Prefer watching the video? Here is a video version of "How to make Blender run faster".
Discuss this article on Reddit.
You can support my effort by purchasing the Blender assets shown in this article (and video) from my Patreon.
I also offer free and paid add-ons for Blender. You can find them in my Gumroad page.
I also offer private tutoring on any topic you encounter on this blog. Please contact me to ask for rates. I offer affordable remote one-to-one learning packages depending on where you live.
In this article, I will show you some of the tips and tricks to get the most out of your old computer in order to use Blender as efficiently as possible.
We will start by configuring default Blender setup in Blender's preferences. Then I will show you some of the render settings which will in general give you a speed boost. Finally, I will show you some tricks while using Blender which will help you get very efficient results.
Blender Information
This article uses Blender 4.2.8: Download link to latest Blender 4.2.x. Supported until July 2026.
How fast is my computer?
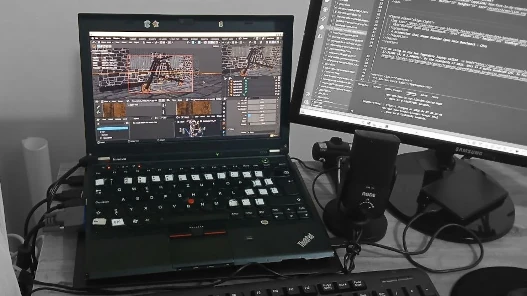
I am using an old but legendary laptop called Thinkpad X230. My CPU onboard is "Intel i7-3520M (4) @ 3.600GHz". By the standards of 2025, this is a quite outdated CPU. In fact we can check this CPU's performance against others in Blender Open Data Benchmark.
For example, look at the screenshot on the right. You will see some of the best CPUs in the world on which Blender was tested. It appears that the best CPU has a "median score" of 7099. The higher this score is, the better that CPU is for using Blender.
Curious about my CPU's score? All we have to do is go to the 2nd page in this list. I mean, 2nd page from the last.
As you can see, my laptop's CPU has a median score of 15. Basically, the best benchmark record on this list is about 473 times better than my laptop.
As for the GPU, my laptop does have a GPU, but it is a so called "built-in" GPU. In other words, my laptop does not really have a dedicated GPU seperate from the CPU. This means that, as far as Blender is concerned, my laptop does not really have a GPU.
"I need a better computer to learn Blender"
No, not really. In this post, I will show you how you can get most out of your old hardware. And yet, needless to say, you probably already have a better rig than mine. So you really have nothing to worry about. Until I get rich doing tutorials, I'll continue to use this laptop for all my upcoming tutorials.
I would like to challenge this idea that you need the newest and strongest computers to do anything in Blender. This is simply not true. Also, a big advantage of having a slower computer is that, you will end up learning a lot ways to optimize your projects. Having known these ways to work efficiently with Blender will pay off in orders of magnitude once you work with a powerful computer.
Let's get started, shall we?
Blender Preferences
Let's go ahead and open Blender's preferences. Here we will tune down some of the settings of Blender. This will help Blender consume as little resources as possible.
If you just opened Blender now and are changing the preferences, the settings will be automatically saved .
In the preferences, you will see bunch of tabs on the left. Not all of them are relevant for us. I will walk through the important ones now.
Interface Tab
In interface settings, turn off the following options:
- Region Overlap
- Navigation Controls
- Anti-Aliasing
Right: With Region Overlap.
Notice how on the right side, behind the toolbar is greyed out. This is all the are that we save from calculating.
Region Overlap
This is going to block out parts of the viewport that are usually hard to see. This way your computer will not have to draw these parts of the viewport. Hence, it will save us some performance.
Navigation Controls
I am a fan of using Blender mostly by shortcuts. The Navigation Controls that you see on the top right of your view is mostly unnecessary, at least for me. So we will turn it off.
Text Anti-Aliasing
This setting makes the overall text of Blender look "better". Turning this off can give you a small performance boost. So why not? Besides, I think it makes Blender look retro. I like retro.
Viewport Tab
Now onto the next tab in Blender Preferences. Here we have a quite a bit of stuff to optimize. As the name of the tab suggests, ("Viewport"), these settings are relevant for where you spent 90% of your time in Blender: The 3D Viewport. We will turn off every setting that we really don't need, without giving ourselves a "visual punishment". That is, you will still see your models, textures etc. in original quality. We will only turn down, what I would call, "cosmetic" quality settings in order to save from performance.
3D Viewport Axes
This is yet another navigation tool that we don't really need. Anyways we should be comfortable using the mouse and keyboard shortcuts. Using a mouse and a keyboard will save you a lot more time and give you a lot more control. The performance gains for turning is off is probably neglible, but here you go.
Viewport Anti-Aliasing
This is a similar setting to the "text Anti-aliasing" we turned off before. This option smoothes off jagged edges in the viewport. You can really notice this if you really zoom into your viewport. For little cosmetic gains, this will actually slow down your viewport. So it is a very good idea to turn off anti-aliasing completely.
Overlay & Edit Mode
This two options is similar to the anti-aliasing, but for wireframe overlays in the viewport. Just turn them off.
Anisotropic Filtering
This is a setting that improves appearance of textures at odd angles, like very low angles. Imagine loooking at a plate not face on but from the side. This is a performance needy function and I'd advice you to turn it off. Just remember that these settings are relevant to the viewport. They will not effect how your final renders will look like.

Image Display Method
There are two options: 2D Texture and GLSL. They basically achieve the same thing, except that the former is solely calculated on the CPU, whereas the latter is calculated using a GPU. GPU calculation is faster for such things, but my laptop does not really have a dedicated GPU. So my only option is to choose 2D Texture anyways.
If you choose Automatic, Blender will automatically choose the correct option for your computer. So yeah, you may want to leave it on Automatic. But it is good to know what these options mean.
GPU Depth Picking & GPU Subdivision
Turning these options might save you some good amount of performance. However like the CPU/GPU dilemma, these last two options are also about whether you want to calculate things on the CPU or GPU. Like I said before, I don't have the option to use GPU anyways.
Although keep in mind that if you run into bugs when you try to select an object in your scene, especially objects that are visually in front of each other, then turn GPU Depth Picking off and the bugs might go away.
System Tab
Good! We've made so far. This is the final option we need to toggle in Blender Preferences.
It called Max Shader Compilation Subprocesses, and it will tell Blender how many CPU cores it can use in order to compile the shaders. This is relevant to both when EEVEE is compiling your shaders in the viewport and when Cycles is compiling the shaders in the viewport and before rendering.
It is a good idea to learn now how many CPU cores there are in your computer. If you recall, my CPU was "Intel i7-3520M (4) @ 3.600GHz". The number "4" in paranthesis there is how many cores I have.
I have personally set "Max Shader Compilation Subprocesses" to 3, because during shader compilation, I want at least 1 CPU core to available for other tasks. For example, when I am recording the video tutorial, which by itself is a heavy task for the computer, I want the resulting video to be as smooth as possible. If you have a high end computing, it may be hard to imagine what I mean here. But yes, if you are doing a video recording at the same time when your computer is running a heavy computation, then the video encoder can get overwhelmed and the resulting recording will sounds like as if you were having a phone call in a tunnel.
If you watch the video version of this blog post, you will actually notice one such instance where my voice is unintelligible due to the encoder overload. It happens at timestamp 28.34. It is happening because rendering process overwhelms the CPU and there is no resource left to capture my voice and encode it.
Was not the magic of computers more noticable when they were a little slower? These days they are so damn fast that we forget to appreciate all that is happening under the hood. Don't take it for granted.
Awesome, we are now done with the Blender Preferences part. We will continue to review the render settings for EEVEE and Cycles to get the best results in rendering as fast as possible. We will later review some tips and tricks that can help you use Blender more efficiently.
Remember to take a break for now.

EEVEE & Cycles Render settings
In this section of the article, we will review the render settings for EEVEE & Cycles. See the image to see where the 'properties area' is at. This 'properties' area is the 2nd place where you will spent most of your time in Blender, right after the 3D viewport.
Notice the symbols on the Properties area stacked on top of each other. These are called 'tabs'. Look at the 2nd symbol from top, it looks like a camera. This is the render settings tab. If you hover your mouse pointer over camera symbol, the popup text will read "Render".
Now on the right, you will see bunch of "panels", some of which I highlighted. The highlighted ones are relevant for us in this article.
Just to recap: The main areas in Blender's interface are called "areas" . Properties Area has bunch of "tabs", which hold settings for specific contexts. Each Tab has bunch of "Panels", which organize these settings.
Optimized EEVEE Settings
Let's begin discussing optimum settings for EEVEE then. On the top, make sure that "Render Engine" is EEVEE. Now the Render tab will show settings for EEVEE.
Now let's go over the highlighted panels one by one:
- Sampling
- Clamping
- Raytracing
- Volumes
- Simplify
- Film
- Performance
Please keep in mind that we can write technical books about some of the terms in these panels. I want to explain the settings for a non-technical artist who would like to use this digital tool (Blender) as efficiently as possible, without frying their brain.
Sampling
Viewport
The higher the "Samples" count is, the less noisy your renders will be. This is more true for Cycles. I found it to be less relevant for EEVEE.
Temporal Reprojection & Jittered Shadows
I personally haven't found much difference either in Performance or appearance when I turn on or off Temporal Reprojection.
Jittered shadows is a quality option to smooth the appearance of shadows in EEVEE. This has a high performance impact. Leave it turned off.
In order to see how your shadows look with this option, you also have to select your light object, go to "Object Data Properties" tab for the light object (green bulb symbol on the tabs stack), and turn on "Jitter" under the Shadow Panel.
Clamping
Clamping is a setting to have a "max" and "min" amount of light intensity and light bouncing for your renders. To understand this better, imagine this: I am trying to make my room brighter. For that I use one bulb. But it is not enough. So I keep adding another bulb. It is still not enough, so I end up adding 1000 bulbs to light my room and now I am satisfied.
However now the Universe has to calculate the light dynamics for a 1000 light sources just for my room. Each like source shoot photons which has to bounce off from 6 sides of the cube shaped room, which exponentially increase the calculations. Too much work for the good old Universe.
Clamping helps us put a limit over this insanity. For example, a value of 10 for Surface: Direct Light setting will "clamp" down the amount of light bounces no matter how many light sources you add.
I'd suggest you to set all the 4 options here to "10". Keep in mind that, you renders might get less noisy for some complex scenes, and yet the lighting of your scenes may look "odd". For example it may look "dull" with less realism than you expect, or it may look darker than you expect. In this case, in order to get the most possible quality back again, you should set Surface: Direct Light setting back to 0, which allows maximum number of light sources and light bounces.
In short, clamping does not have a direct but an indirect effect on the performance: It will reduce noise of your scenes in exchange for realism. Since it reduces noise, you can keep your Samples count in the above settings for a lower value and thus finish renders faster.
Raytracing
We are here to talk about performance and efficiency right? THEN STAY AWAY FROM THIS PANEL. LEAVE THIS BEAST OFF.
But seriously though. This Raytracing options for EEVEE will make your renders in EEVEE almost as realistic as in Cycles. If you remember, Cycles is a raytracing engine. EEVEE cuts corners in the name of speed and give us real-time performance. By turning this raytracing panel on, you will sacrifice performance in the name of really realistic renders in EEVEE.
Volumes
Don't do real volume simulations or materials in Blender unless you have a really good computer. You need to fake smoke instead, if you want to have it in your scenes. This can be a compositing effect or simply a smoke image, or a smoke "sprite".
We are not doing scientific simulation, we are trying to do Art. So don't be afraid to fake things.
If you really want to use volumes, smoke etc. , then:
- Keep Resolution as low as possible: 1:16
- Play with the Custom Range to avoid calculating unnecessary distances. Keep the metric range withing where your smoke is relative to the center point of 3D space.
Simplify
Simplify is a good way to, well, simplify your scenes. This is mostly useful when you want to do "bulk simplifications" in your scenes.
Imagine that you have 10 objects with 6 levels of surface subdivision. You will have millions if not trillions of triangles under such circumstances. Not good for our poor old laptop with a humble CPU.
Now your computer freezes and you want to turn down the subdivisions, only to turn them back on during rendering, since you want full quality with trillions of triangles (because you are insane). This means you have to turn down 6 levels of subdivisions for 10 objects, and same steps to turn them back on. Tedious.
This is where Simplify panel comes to rescue. For example you can set Viewport: Max Subdivision to 1, in which case all your existing subdivision modifiers will be set to 1 in bulk. And if you keep Render: Max Subdivision to 6, then when you render, the subdivisions will automatically be set to as high as you have set them.
Other options are kind of self explanatory. But for now I will not get into the simulation or Grease Pencil territory.
Film
Turn Transparency on. This way, in the viewport, the "sky" will be "alpha channelled out", i.e. invisible. Usually we use this option to make the background transparent. Then we can add a custom background in the compositor.
However, this actually gives us a good performance gain, because once the sky becomes transparent, this is all less area to get calculated by our poor CPU.
If your sky has a light, i.e. a HDRI, atmospheric effects, or a simply single color light emission, it will still shine on your scene and have the same exact effect. When you render and you want to see the sky, simply turn this option off again.
Performance
Turn off High Quality Normals.
Viewport: Pixel Size is the single most important thing that will absolutely speed up your scenes in the viewport. Remember to switch to "Material Shading" or "Rendered" Viewport Shading options to see the effect of this option. They are in the top right corner of your 3D viewport. See the small image on the right for a screenshot.
If you set the pixel size to anything lower than 1 (well, think of 2x, 4x and 8x options as a division, not multiplication), then you will have less pixels to calculate on your viewport. Go ahead and try it. You will see that your viewport has gotten extremely fast already. The tradeoff? Now everything looks pixelated.
You know, this option can be really useful while you are doing modeling for instance. It may not be very plausible when you are doing texturing or lighting, since you'd kind of want to see your textures in the best quality as possible. But yes, now you know this option exists.
At the end of this article, I will show you a trick to render in the viewport really fast. Both for EEVEE and Cycles. This trick is very much related to theory behind this Viewport: Pixel Size option.
Optimized Cycles Settings
We will now go over the efficient render settings for Cycles. On the top of the area, choose Cycles as the render engine.
Some of the options are really similar if not the same for EEVEE and Cycles. I will mention them very shortly for brevity.
Now let's go over the highlighted panels one by one:
- Sampling
- Clamping
- Raytracing
- Volumes
- Simplify
- Film
- Performance
Sampling
As you can see, Sampling panel is way more complex in Cycles than in EEVEE. But don't be afraid, we will change only one settings. The settings you see on the screenshot to the right are default settings. They are mostly optimized for performance already. Except for one.
Both the in the Viewport: Max Samples and Render: Max Samples options, there is an insanely large number, i.e. 1024 and 4096 respectively. This number is how many samples will be calculated in the Viewport and in the final Renders to finish the rendering. Remember that the more the sample count is, the less noisy your renders will be. And of course, the more the sample count is, the more time it will take to finish the calculation.
This insanity is kind of remedied by yet another option: Noise Threshold. You will see that this option is turned on by default both for the Viewport and the Render panels. Basically, Blender can understand how much noise is left in an ongoing render, whether in the viewport or in the final render, and then terminate the rendering process if the noise has been reduced to an acceptable level. This level is the Noise Threshold, and the default settings is 0.1, as you can observe.
Personally I like having more control over what is going on during my renders. Thus I turn of the Noise Threshold option altogether. And for a good sample count, believe it or not, I set it to something like 10. Yes, about 10 sample calculations are often more than enough to get an acceptable image. There will be some noise and fireflies left, but they can be addressed with the Denoiser easily.
Denoisers are a gift to 3D artists in this day and age of Machine Learning (i.e. "AI"). Thanks to denoisers, we can heuristically calculate how an image is supposed to look like without all the noise. Personally, when I am doing work in Blender, I turn off denoisers as well. Only when I would like to see how the final renders would look like, I turn on the denoisers.
When using Denoisers, I also set the Start Sample setting under the Denoiser tabs. This settings tells Blender when to start Denoising your renders. Remember that in the Viewport, denoising happens after each sample calculation. Which, of course, slows down each sample calculation noticably. This is why, if I am calculating 10 samples in the viewport, I also set Viewport Denoiser Start Sample to 10. So basically I let Blender calculate all the samples, and then do the denoising.
When you are ready for final renders, always experiment with the right amount of Sample count + denoiser option turned on and off. Do not calculate more samples than necessary. For your final renders, this is a crucial option if you want to save time.
Light Paths
As the term "Max Bounces" suggests, this panel is where you can finely tune how many light bounces you want to calculate for your renders. This is a very good place to speed up your Cycles renders dramatically. Instead of going over each settings one by one, we can simply use default templates Blender already gives us.
Click to the top right hamburber menu. I highlighted it in the screenshot. For fastest renders, choose "Direct Light". This results in dimmer scenes, sharper and less complicated shadows. But you will get huge performance gains.
For a little higher quality renders, choose "Fast Global Illumination". Now you see that the numbers are higher: There will be more light bounces to calculate. Make sense, no?
For the best quality, as you can guess, you should choose "Full Global Illumination". Personally the differences are hard to notice between fast and full global illumination. To deliver professional work, you may want to opt in for Full Global Illumination for your final renders.
Volumes
What was our motto for this blog post?
Stay away from Volumes.
Simplify
Same thing as in EEVEE.
Film
Same thing as in EEVEE.
In the Transparent option, you will also see an additional "Transparent Glass" option. This setting is basically making the sky transparent, even when you look at it from behind a glass material. I'd suggest you to turn it on as well.
Performance
Here you can also choose from one of the default options by clicking the hamburger menu on top right corner of the panel. I also highlighted it in the screenshot. Of course I usually go with "Faster Render".
If you want to have fast renders but also want to save from memory (RAM) usage a little bit, then turn on Acceleration Structure: Use Compact BVH option.
Notice that here we also have the Viewport: Pixel Size option. If you are fine with a little "pixelated" appearance in the viewport, you will get huge performance gains.
Final Tips & Tricks to speed up render time in the viewport
Great. You've made it this far. We have set Blender up for the most efficient way possible. Now let's talk about a quick final tip that can take things to the next level.
Spoiler: Remember the Pixel Size setting? This trick I am going to show you have something to do with the pixel size setting indirectly. If you can understand the theory behind this trick, you will have a Euroka about how to use Blender efficiently.
It is very simple actually. Take a look at this screenshot of Blender again:
This screenshot above is how a default area/workspace layout in Blender looks like. The highlighted area is called "Outliner" and it shows a list of all objects in the scene.
We will change this area to yet another 3D viewport area.
Open the area list menu by clicking the button on the top left corner of the Outliner area. Then select '3D Viewport' in the menu.
Now that area is also another 3D viewport.
We will now switch to rendered view in this small area. To do this, you need to select the rendered view button on the most right end of the green highlighted strip. Since this area is so small, parts of this green strip will be unvisible. You need to place your mouse cursor on it and scroll, like you scroll on a page. Then the strip will scroll to let you see other parts of it. Scroll till the right end in order to see the rendered view button.
We are now rendering in the small area as you can see in the screenshot below. Do it on your computer and tell me the first thing you notice. Yes, it is rendering really, really fast.
How is this possible?
The answer is simple. The smaller the area, the less pixels to calculate. This simple understanding can be applied in a lot of contexts in Blender. Want to get faster final renders? Render in HD (1280 x 720 pixels) rather than in 4K (3440 x 2160 pixels). Want to preview your new car paint material as quickly as possible? Apply it on a simple sphere rather than your finished car model.
The idea is all about simplifying things. Simplify things at first while you develop things. Gradually crank up the quality as you wish to deliver your final work. Until then, work in small windows, preview efficiently with simpler models and you will save a lot of time.
Do you now understand better the gimmick with the Pixel Size option? Basically when you reduce the pixel size, you are doing the exact same thing as in rendering in a small window: Reducing the amount of pixels to calculate!
Final Words
In this blog post we laid out the groundwork in order to work with Blender as efficiently as possible. These tips are especially relevant if you have a low end computer. But if you have a good computer and you forget the tips and tricks explained in this blog post, you can choke down even the most powerful commercially available computer.
My next Blender related tutorials will be about actually using Blender. Together we will model, texture and light a very peculiar wooden scooter from Congo called Chukudu.
If you liked this blog post, you can support me by purchasing assets from my Gumroad or Patreon. Links at the top of the page. You can also buy private lessons from me. I teach a wide range of subjects from Math & Science to Western Philosophy, from basic & advanced computer knowledge to Blender. Please contact me to if you are interested.
Bye for now.
Footnotes
- It is still a good idea to save the settings to be sure. On the bottom left corner of the Preferences window, you should see a button named "Save Preferences*". If you don't see it, you should definetely see a hamburger menu (3 horizontal lines stacked on top of each other), on the same location (bottom left corner). If you click the hamburger menu, you should see a "Save Preferences" button for sure.↩